Translate

Monday, December 25, 2017

Should You Teach Yoga Less? Take a Break?

take a break
By Kathryn Boland

Are you wondering if all the teaching you’re taking on is just too much? If you should take a clean break from teaching? In a prior article, I discussed ways to go about seeing if teaching more is sustainable, and how to go about doing that - but, alas, that can all go too far. We all need rest. No living organism can operate non-stop. Teaching yoga full or semi-full time can feel like that, like there’s always constant travel, things to do and plan, with no time or energy to attend to one’s own needs. 

As yoga instructors, we offer a lot to our students. However, if we have nothing of ourselves left to give, then that’s what it is. It’s just not sustainable. Let’s look at this first in regards to how we can sense these signs of burnout, and then what to do about them. Through it all, yogic virtues and ways of acting - non-attachment, non-judgement, moderation, truthfulness, and more, can truly light the way. Om Shanti!


1. Burn-out - the physical, mental, interpersonal, and spiritual
            
Before one can make healthy changes, he/she must recognize the benefit - sometimes the need - to do so. With burn out, helped by stepping back one’s set of obligations (and little else), key signs are present. Physically, you are most often tired. You might find yourself oversleeping - your body telling you that you need more rest. There are issues with appetite. Headaches and digestive pains are common. Particularly with active people like yoga instructors, you may find your muscles often very sore. 
          
You might feel like you’re simply low on physical energy - all too often. Mentally, you might feel like you’re in a fog. It’s hard to think through and sort out various class changes, subbing, sequencing, et cetera. You might even occasionally mix these things up, maybe even missing something to which you had committed. While teaching, you may find yourself mixing up cues, Sanskrit names, et cetera that would normally be no problem for you. 


Spiritually, you may feel in a “funk”. Your fire, your passion, your love for teaching may feel faded. It’s a symptom of depression, but also of burnout, to lose the some amount of interest in things that once captivated your attention and passion. It might not be all of these experiences, perhaps rather a different kind of burnout - an exhaustion of your patience with constant travel, a realization of serious financial deficiency. 
           
In your unique life situation (geographic area, etc), the amount of teaching that you’re trying to offer consistently just might not be as viable as you thought it might be. A wonderful thing about yoga instruction is its malleability; it doesn't have to be all or nothing, full-time or no classes at all. Let's take a look at that next.


2. Ok, so you’ve decided to step back - what’s next?
         
Let’s assume that you don’t want to leave teaching entirely, forever (though that may be the case for some people - something not to be judged). It might be the right answer for you to take a break - one month, two months, six months - whatever you feel will give you the distance you may need to come back refreshed and eager. You can use this time to delve deeper into your practice and/or yogic literature (old and new), or simply focus on another area of life that leaves you fulfilled.
            
Some teachers find long-term subs in cases of medical need, seasonal travel, maternity/paternity leave, and the like. This is certainly also an option if you’re looking to take a break from teaching. If you’re looking to have classes filled on a long-term basis, or scale back your classes, there are most likely many eager and willing candidates to take over (for some months or permanently). Studio sub lists, social media, and other networking can help find these teachers.  


Should you take a break, or just step back? If it’s simple logistical difficulty, scaling back might be best. If it’s a deeper exhaustion and loss of passion for your teaching, you might truly benefit from a break. It offers the opportunity to come back with a rekindled enthusiasm for yoga instruction. 
          
How do you decide which classes to let go? It’s certainly easy to develop attachment to our classes - sometimes partly out of force of habit, and inertia to step away from such routine. What can be deeper is a sense of pride and appreciation for what we’ve built with certain classes, especially if it’s a group of consistent, longer-term regulars. 
          
Doing your best to practice aparigraha, non-attachment, can help. Perhaps these classes are the ones you hold on to. Other factors include travel, scheduling, location, and pay. If It’s truly hard for you to choose, you could even compare your classes on a point system, giving your classes a certain number of points on each of these aspects (and perhaps others), and tally it all up. 


The classes with the highest numbers are the ones you keep. It makes the choice objective. Then do the legwork of sending notifications your decision to the appropriate party (or parties). Explain the situation thoroughly, but be respectful of people’s time and attention with brevity.
           
When at all possible, offer the professional courtesy of two weeks notice. Wishing Godspeed! Remember, as our practice teaches, no outcome is truly “good” or “bad” - all are learning experiences that contribute to who we are and whom we will become. 

© Copyright – Aura Wellness Center – Publications Division

Please feel free to share our posts with your family, friends, colleagues, and favorite social media networks.


Slow-Flow - The Yin/Yang in Between

yin/yang
By Kathryn Boland

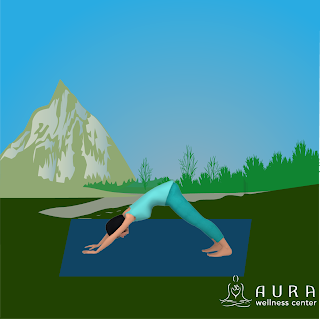
Have you ever taught (or taken) “Slow-flow”? Or perhaps seen a promotion for it and thought “Hmmm, looks interesting”, wondering what it’s like? The form has popped in many yoga studios in recent years. I have personally found it to be quite a relaxing and soothing, yet energizing and motivating, kind of asana practice.
       
It’s sort of a halfway point on a spectrum between Vinyasa and Restorative practice - a Yin/Yang “in-between". Yet “Slow Flow” is not a common part of most teacher training programs. So, we ask, how does one create such a practice - what are the tools and qualities? Let’s look at some!

1. Keep it continuous, but nothing fast. 
       
For instance, match movement to a steady, full and deep flow of breath. Cue “Thread-the-Needle” from Tabletop, but before resting down guide students to “re-thread” a few times - raising that arm to the sky, then re-threading (but not resting back down until the last time). Try “guitar swings”, rolling through the shoulder’s full range of motion (so that the arm makes a large circle) in standing poses. A third to try is flowing from Half-Split Pose (Ardha Hanumanasa) to Low Runner’s Lunge (Anjaneyasana), three to four times.


For an idea of speed at which to take these movements, when I do these flows in Slow Flow classes, the movement shifts slowly enough for me to cue (talk through) the movement while it’s happening. Two other tips for making this approach: first, prepare (trying it out in your body, then writing it down - or whatever you find is your best way to prepare); second, adapt in the moment by observing how your students receive what you’re offering (as we ideally always do in our teaching!).

2. Keep it more grounded than standing, and challenging, yet not rigorous. 
         
Most Slow Flow classes I’ve taken, and then went on to teach in the mode of, were also more gentle than most Vinyasa classes I’ve taken, yet not as gentle as most Restorative classes (or even Yin). Compared to Hatha, it does not have the same continuous flow, and is less rigorous as well (as Hatha offers intensity through holding and refining poses). When sequencing these classes, think about keeping things mainly grounded - for instance, feel free to include Sun Salutation As, with variations such as backbends, sidebends, and twists.

But cue “low” as opposed to “high” lunges (with the back knee dropped and toes untucked, yet also offering an option to take a “high” lunge version if students may prefer). Feel free to include a balance section, for all of the benefits these poses offer. Yet keep it relatively simple and accessible - such as a Tree Pose (Vraksasana), Single Standing-leg Balance, and Airplane Pose (Dekasana).
         
Think about keeping a majority of the class grounded on the mat - “low” lunges and variations with them, with seated, kneeling, prone, and supine poses. Perhaps save your skills at teaching more complex inversions and arm balances for your intermediate to advanced Vinyasa classes.


Come with a frame of healthy, balanced, whole-body movement and stretching - rather than a “workout” (yet that might happen for some students, and that’s just a plus!). “Core work” might happen through moving through poses, but it doesn’t fit as a primary goal in this form. That’s a beautiful thing about this form, I do think - that sense of balance, moderation, and inclusion of diverse offerings - in truth, the yogic way!

3. Follow your instincts, and let students follow their own. 
         
A difficult thing about learning to teach this form is its openness; there’s no set form, such as with Bikram or Ashtanga, or common convention such as with Vinyasa (warm up, “Sun As” and “Sun Bs”, balancing, grounded poses). It’s something to learn through taking classes, collaborative discussion with other instructors and studio administrators, and building your experience teaching the form.
         
A good thing about all of that, however, is actually that same openness; unless doing something counter to yogic teaching, anatomical science, your best judgement, and the like, you can’t be “wrong". The same goes for your students practicing under you. Guide them to the best of your ability, but beyond that, their practice is theirs and not yours (as it is in teaching any other form!).


Given the openness, and relative newness (as compared to yoga practice at large) of Slow Flow, allow space for mutual learning and collaboration for all involved parties. Hatha and the (much broader) yoga practice evolved thousands of years ago through a group of people combining their wisdom and discoveries, and so on through time - allowing for the practice to adapt to changing conditions of the world at large, yet still maintain its essential essence. Through exploring and refining this “Slow Flow” form, we can part of that development. Namaste.

© Copyright – Aura Wellness Center – Publications Division

Please feel free to share our posts with your friends, colleagues, and favorite social media networks.


Sunday, December 24, 2017

Winter Asana - Warm Up and Energize

warm up and energize
By Kathryn Boland

Are you recognizing your students’ needs shifting as the temperatures drop? Are you looking for unique ways to help meet these needs? Winter places new demands on the body - more energy needed to keep the body warm, and more rest needed because of that.
        
At the same time, some offering of active practice can help lift spirits and energies.  Like with yoga instruction in general, it’s all about balancing sometimes contrasting ingredients in a way that creates something cohesive and appealing. 
        
First consider the class environment. With temperature, it’ll feel very nice to students to enter a warm studio. Yet avoid “blasting" the heat, so to speak, as a drastic change in temperature (going from outside to inside) can shock their bodies. Music, if used, is most effective when calming and grounding, yet with an uplifting element to it.


To open class, consider “meeting students where they’re at" - most likely craving something restful, comforting, and nurturing. Try a Child’s Pose, or - on the back - a prop-supported Baddha Konasana or Constructive Rest (its opposite - feet wide and knees knocking into each other). Guide students into yogic breath - not necessarily slow, but full, deep, and rhythmic. 


What can feel especially nice in cold temperatures is taking longer inhales than exhales. Try cueing a breath rhythm of three counts inhale, five counts exhale - and perhaps exploring other counts in the same (or a similar) ratio. It helps warm and energize the body. Also towards the beginning of class, make sure to thoroughly warm students up, before going into deeper poses, perhaps a bit more than you might think necessary; cold muscles cannot stretch as easily, and are more vulnerable to tearing (a.k.a. injury). 
            
There are plenty of ways to explore different types of movement- varying dynamics, planes, levels, et cetera, to keep your students stimulated and engaged through this - to the point where they might not even realize they’re still “warming up”! Getting creative in these ways can help build heat in the body, balancing the abundance of Kapha in this season with Pitta. 


Try high and low Boat Pose (Navasana), transitioning back and forth in between them. Cue Three-Legged Dog Pose to Three-Legged Plank Pose. Emphasize core activation, guiding your students to scoop the belly in towards the spine. Add in a couple more Sun Salutations or Warrior Poses than you might normally, perhaps leaving behind one or two deep sustained stretching poses in order to accommodate for that in your allocated class time.
          
On the other hand, winter makes us tense and tight. We scrunch up our shoulders and facial muscles, and the body’s skeletal muscle increases its resting tone in service of keeping warm. So we do need good stretching this time of year, after gentle movement to warm the body and begin that process of loosening tense musculature. 
           
Try cueing a swing of an arm through a full range of motion in any standing pose, and then into a half bind - movement to warm and loosen, deeper stretching to further release the muscle. Certainly include deeper stretching poses in your winter classes - Pyramid Pose, other forward folds, and the like - but perhaps not until the latter third of class. As an even further precautionary measure, ask your students if they feel warm before cueing something like Paschimottanasana or Janu Sirsasana. 


And perhaps take a bit more time than usual to truly wind down classes, to offer students the rest that their bodies may need in this season - but which modern life might not allow them to enjoy. Even if it’s a Vinyasa class, ask students to get bolsters (if available) and offer a few prop-supported Restorative poses - such as Viparita Karani, Supported Bridge, or Supported Supta Baddha Konasana - towards the end of class.  
            
Do your best with class timing to allow for a nice long Savasana, and a slow, gentle exit back to full consciousness. Yoga can help us find a healthy, enjoyable balance between calm and activity at any time of the year, but particularly in the winter months when the environment challenges our physical systems. Those detailed here, and countless others, are methods for that. Best of luck and Om Shanti! 

© Copyright – Aura Wellness Center – Publications Division

Please feel free to share our posts with your friends, colleagues, and favorite social media networks.


Friday, December 01, 2017

Yoga Poses for Hikers

yoga for hikers
By Michael Gleason

Welcome to the great outdoors!  Our sprawling urban centers are always alive, pulsating with subway cars or other rapid transit, forward thinking universities and their researchers, and technology firms consistently coming out with exciting innovations.  And all of that is wonderful most of the time.  Access to coffee shops, arts and culture, and progressive or unusual ideas are a delight.  The city is awake and requires everyone to muster a definite amount of energy to keep themselves going but also to propagate all of these concepts.  

Yet, what happens when our bodies ache or fatigue sets in?  What are some of the remedies to urban life, to electricity going all the time enabling street lamps and electronic gadget charging stations to keep all the excitement going?  Where do people need to go in order to find their charging stations and deliberately go offline for a while?


The answer is wilderness.  The urban denizens already program (no pun intended) yoga or Pilates or the gym into their schedules.  But when happens when we need more than just the quiet of Shavasana after one of our favorite yoga classes or the endorphins from cardio and weights?  How do we revert back from human-doings to human-beings?  Perhaps it’s time to look at the rapid transit maps that go further than local service or check the apps and maps for something with a lot more innate green space.  In other words, move your yoga and mindfulness practice to the great outdoors.  Getting in a good hike helps with longevity and wellness and, with yoga added in, just that much faster and appreciable an amount of stress reduction.

Yoga can be done before, during, or after hiking.  The yoga poses performed on the flat, smooth floors and mats in our yoga studios can adapt easily to the natural floor of campsites, unpaved parking areas, and the hills themselves (provided none of them are slippery from condensation or ice).  


One of the many beauties of yoga is its versatility and ability to be practiced anytime, anywhere.  So all the more reason to work yoga poses into hiking.  And being flexible, or having yet to become flexible is seldom to never an issue.  

While it is established that hiking is great for stress relief, it is more important to maximize our time away from the urban centers regardless of progressiveness.

These are the more commonly performed yoga asanas connected to hiking.  It is good to hold each pose for five to seven breaths.  Take some great pictures and show them to your friends when you get home!

- A good intro is Forward Fold, once your torso is as down as possible – folding your
arms if they cannot reach the ground is always fine – really engage your hamstrings so they are prepared for the hike, have your sits bones face the sky, bend your knees so you can bring your torso down as far as possible without injury.

- Move into Downward Facing Dog, first start by getting all floors on the ground in plank pose and then raise your hips so you look like a dog stopping to smell something, the trick is roll away your shoulders and make your tailbone point upward.

- Low Lunge, from Downward Facing Dog put one knee on the ground and send the other knee “skyward”, use this as the your opportunity to press your hips together and give them a good stretch.


- In Pyramid Pose (it actually starts in Standing Mountain Pose), move your feet about one yard apart, if possible point your toes out 45 degrees, inhale and send your arms straight over your head, keep your hips facing forward, and bend down toward your right leg with your arms dropping in the promise, if you are pliable enough see if your forehead can touch your right knee, lift your torso up and gently transition to the right knee with the same challenge with your forehead

- Take a minute to get back into Mountain Pose, this general pose is one of the “halfway points” from one pose to the next as you are standing as tall as possible and seeing if you can get your back to stretch upward, a great help with posture, especially if you plan on lugging a knapsack; if you need a rejuvenating stretch while on a hike do the modified Mountain Pose: lie down your back and put your feet up on a boulder or side of a hill.

- Coming down the hill or once back at the camp site consider doing Rock Lunges, start by standing as tall as possible, put your left foot on a rock (put your ankle in your hands if you are sore), lengthen your spine just like Mountain Pose, stretch your arms up nice and high so the circulation really travels in and out of your arms, repeat by placing your left foot back on the ground and placing your right foot up on top of the same rock.

© Copyright – Aura Wellness Center – Publications Division

Please feel free to share our posts with your friends, colleagues, and favorite social media networks.


Sunday, November 12, 2017

Yoga Instructor Tips for Subbing - Getting Over the Learning Curve

tips for subbing
By Kathryn Boland 

Have you ever “subbed” (substituted classes) at new locations and gotten confused with logistics? Have you been unsure of what questions to ask to be better prepared? Teaching in new places (new to you as a teacher, at least) comes with many details to learn. This can sometimes all have to happen quite quickly, such as if you’re stepping in to help a fellow teacher in an emergency. 

Other times, the process of communication necessary to make sure “subs” (substitutes) have what they need to succeed sometimes breaks down, for varied reasons. What can you as a teacher do to facilitate communication? Let’s look at some basics of understanding. Asking certain questions, if what you need to know isn’t explicitly stated, can also show potential future (longer-term) employers that you’re knowledgeable, conscientious, and thorough. 


1) The Where

You can’t teach if you can’t get there. And, with the benefit of the doubt that unfortunate travel situations happen to everyone at one point or another, it’s not acceptable to be late as a teacher. If you’ve never been to the location, if possible, take a trial run to there. If you’ve made it there before, you’re a lot less likely to get confused and lost. If you get lost on your trial run, and you manage to figure out what went wrong, you can avoid that happening when you actually have to be there to teach. 

Even more detailed, make sure you know where in the main location you’re teaching, as well as details such as where all the props and the music system is. If possible and permissible, try playing your music before class. Again, if you can iron out any issues then, you won’t have to do so while teaching (which, as many of you readers have experienced, isn’t pleasant for anyone involved). 


2) The Who and What 

At the very least, ensure that you know the style that you’ll be teaching. That seems obvious, but in some stressful emergency situations sometimes all teachers (or administrators) say is “Can you teach?”. Sometimes schedules say “Vinyasa”, but that could mean different things; we could say there’s a Vinyasa spectrum with classical Hatha that flows on one end, and “Power”/very Westernized Vinyasa on the other. Perhaps ask about the pace of the class. That will help offer students what they’re more used to - though new offerings and perspectives for them are never a bad thing! The key is balance. 

On that note, ask about the students you’ll likely be teaching (perhaps a group of “regulars”) - general ages and physical conditions, typical number, et cetera. Sometimes those things can greatly vary in one group of students. Classes of varying ability levels are challenges for us teachers, as well as a growing trend - and perhaps a discussion for another day. For the purposes of this here discussion, if you know that you’ll have a very mixed-levels class, you’ll be better prepared with a sequence, and varied options, that can offer all attending students - no matter their level - something special. 


3) The How 

It’s also helpful to know more about the qualities of teaching that the students are used to. This aspect can be a tricky balance, because we teachers have to draw from our own authentic truth in order to succeed - yet there are small adjustments that we can make to that in order to offer students what might feel a bit more familiar and comfortable for them. Another tricky balance is that it can spur growth to experience something new, yet we don’t want to introduce too much novelty all at once.

If at all possible, take class at the location where you’ll be subbing. Even if it’s not a public class offering, you may be able to arrange to take the class under the condition that you’ll be subbing it in the near future. Even better, if in any way feasible, take class from the teacher for whom you’ll be filling in. One step further, take the actual class you’ll be subbing (if ongoing). These are all levels of possible experiencing of what typically happens in the class that you’ll be covering, and something is better than nothing.  


While in such a class, regard aspects of the student population (as described), sequencing, pacing, asana style, the teacher’s general demeanor and personal teaching signature, type and volume of music (if used), and atmospherics (such as lighting, open or closed curtains, if candles and/or incense are used). If nothing else, you’ll likely learn a thing or two from the teacher for whom you’ll be subbing (or whichever teacher is teaching at the same location). 
                  
Subbing - even if quick and unexpected (and therefore maybe a bit stressful for all involved) can be a wonderful learning experience. As with anything else in our teaching, we can grow if we remain open to the wisdom of fellow teachers, owners of where we may teach, our students, and our own inner voices. Shanti to all! 

© Copyright – Aura Wellness Center – Publications Division

Please feel free to share our posts with your friends, colleagues, and favorite social media networks.


Saturday, November 11, 2017

Pranayama by Another Name - Ways to Include it Anywhere

settling into practice
By Kathryn Boland 

Do you recognize the benefits of incorporating pranayama into yoga classes, but are wary of how some students may receive it - if offered in strictly classical form? Are you seeking methods for transmitting it that will appeal to all students? Pranayama is one the yogic Eight Limbs, and therefore just as important and worthy of focus as asana.

Yet at some locations where yoga classes happen, students may find it overly esoteric or even spiritual (when, perhaps devoted to their own faith backgrounds, that's not something they're seeking from yoga class). Here are simple ways to include breath work in classes that can accessible to all students. As one first tip, cultivating your own semi-audible Ujjayi breath will remind students to come back to their own breath, as well as cultivate a sense of calm in class.


1) Imagery to Build Yogic Breath

A primary step in asana practice is to create the full and consistent breath that supports us through the physical demands of the practice. That is in itself pranayama. That can be done with imagery that most, if not all students, can relate to and appreciate. They can then go forth to have a more enjoyable and beneficial practice - one they'll one to keep coming back to their mats to rediscover. It's useful to offer the following images in the quieter moments of settling into practice, at its start, so that the breath then established is something they can continue throughout practice (and maybe beyond).

Such imagery could be filling up the lungs like balloons, which then empty. Others are like bellows that fuel a fire or an accordion that consistently go in and out - two analogies that additionally layer on a sense of yogic breath's rhythmic consistency. Another rich breath metaphor is to imagine filling up the torso with breath, like it's a cup, from the pelvis to the throat. This image guides students to use as much space as possible for breath, setting that as a precedent for the remainder of practice. The cup fully empties on the exhale, and so on in rhythm.


1) Group Inhale and Exhale

I often include this periodically in my classes. Verbally cue "Breath in together" and follow with your own audible inhale. Then say "Breath out together," and audibly sigh out. This brings students back to breath, them perhaps realizing that they've stopped breathing and then guided to re-establish deep and rhythmic yogic breath. As everyone hears each other's breath, they can feel a bit more united with everyone else in the group.

Breathing together, in its simplicity yet power, is a powerful force for bringing people together. Students can perhaps feel a little less out of place, perhaps behind fellow students in capability, and more together with their peers. This method works well in periods of standing rest between vigorous standing sequences, such as balances and Sun Salutation A or B variations. It can fill space in those times, when rest is called for yet students might feel a little strange just standing and breathing.


2) Kriya Breath with Moving Flow

This method has all the stated benefits of students knowing that they are breathing, and together with their fellow students - yet can take on a different emotional purpose. In bent knee standing poses (Warrior II works particular well for this), have students straighten the front knee and bring arms up, then audibly sigh out as they lower back into the pose with its classical arm alignment. With that breath out, they can add a "Hah" or "Huh", a sort of releasing of aggression that might be held inside.  
I sometimes even have students loop their hands behind their heads and lower back to Warrior II with flexed palms, and say "Imagine that you're pushing away something that's annoying you!" Yoga class can be a safe space to release pent-up aggression or annoyance, such that students can go forward more beneficially in whatever they may need to handle. It can also help students to know that they're not alone in such feelings in the face of difficult situations, seeing fellow students also having that release, even if only recognizing that subconsciously.

Pyramid Pose (a variation of, with the back foot slightly up) to Runner's Lunge and Pyramid to Lizard Lunge also work well for this breath-and-movement type sequence. Be sure to look out for dangerous knee alignment (such as caving in, winging out to side, and traveling past the ankle) through these flows, and advise students accordingly. This is yet another way to offer pranayama that can be useful and appealing for any type of student (of course, allowing for inevitable exceptions) - with an additional emotional purpose. Why not give it a whirl?

© Copyright – Aura Wellness Center – Publications Division

Please feel free to share our posts with your friends, colleagues, and favorite social media networks.


Saturday, November 04, 2017

Yoga Foot Fundamentals and How to Achieve Them

foot fundamentals
By Kathryn Boland

Have you noticed that the feet we want in Mountain Pose are the ones we want for much of the practice? Do you remind your students of this? My students might be starting to get just a little bit tired of me talking about Mountain Pose (Tadasana) feet. I believe that the stability of many poses, and all standing poses, begins at their base in the feet. The stability of a house begins in its foundation, of a tree in its roots. Let's first look at what these Mountain Pose feet fundamentals are.

Have feet parallel and hip-distance apart, and heels slightly apart and toes together. Ground down through big toes, yet feel a lift through the insteps. With those actions is also a natural grounding down through the outer edges of the feet. Simply by the way muscles fire together, that creates a natural spiraling of the thighs. The tailbone is heavy; if an arrow were hanging from it, it’d be pointed straight down at one’s mat/floor below. Let’s now look at how these feet are ideally present in a few particular poses. 


Warrior II Pose (Virabhadrasana II)

There are many complexities to this pose, at its base those essential Mountain Pose fundamentals. Though the angle of the back foot is different, it is still important to ground down through big toes and lift up through insteps. The result will be a spiraling of the thighs that helps keep joints safely aligned and the pose stable. The angles that will result from these actions in the feet, combined with the shape of the pose, can bring a deep stretch through many muscles in the legs (particularly in the calves and ankles). 
    
That’s just one more reason to fully warm up before practicing such poses, as well as to take things slowly and mindfully, and modify if necessary (such as making a shorter stance or placing soft yet supportive props, such as blanket or wedge, under one or both feet). A grounded Warrior Pose can bring feelings of strength, stability, and empowerment - as well as being great for the body in many ways. 


Wide-Legged Forward Fold (Prasarita Padottanasana) 

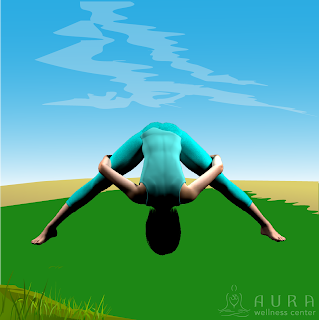
This pose calls for a slight pigeon-toeing-in, so in terms of relationships of body parts, it's similar to a Warrior II foot. That same pushing down through the big toes, lifting of the insteps and pushing down through the back edge, is important here for ensuring that the knees to not collapse in. That allows for stability of the pose, as well as avoiding any strain on the involved joints. 

What's also key here, as in every forward fold, is is to keep a gentle bend in the knees and to slightly engage the abdominals. That allows for one's weight to mainly stay on the balls of the feet, therein avoiding straining hamstrings or other involved parts. That established, students can enjoy all the benefits of forward folding as well as a mild inversion. They can breathe deeply and soften any tension they may notice in the face, teeth, jaw, or shoulders.


Gate Pose (Parighasana)

This pose has a Warrior II foot in the extended foot, not in the one behind the bent knee onto which one is kneeling. On the other hand, that foot is ideally parallel rather than at an angle from heel to toes, because of the straight forward facing of the hips in relation to the legs - versus in Warrior II, where the front leg is facing at a different angle from the hips. Much of the stability of the pose, apart from an engaged core and a heavy tailbone, is in that stable Warrior II foot to the side, with Mountain Pose fundamentals (as described).

From that stability, a wonderful side-body, abdominal, and chest stretch is available. Remember that length through the side body is more important than depth of side bend; encourage students to not bend as deeply if the under-side of the spine is curved. As just another basic reminder for this pose, if there’s any sensitivity in the grounded knee, a folded blanket or a rolled mat under it can help. 

© Copyright – Aura Wellness Center – Publications Division

Please feel free to share our posts with your friends, colleagues, and favorite social media networks.

Monday, September 18, 2017

How to Focus During Meditation

mindfulness
By Sangeetha Saran

Meditation has long been regarded as the ultimate tool for mindfulness and relaxation. According to Dr. Elizabeth Hoge, a psychiatrist at Massachusetts General Hospital's Center for Anxiety and Traumatic Stress Disorders and assistant professor of psychiatry at Harvard Medical School, the practice can help people struggling with anxiety to deal with distracting thoughts in a positive and effective way. Because people with the mental health disorder can't tell the difference between nagging worries and problem-solving thoughts, engaging in mindful behaviors such as meditation help.
Here are some tips that help with focus during meditation:
  • Don't force it. When you're new to meditation, it can be very hard to sit still and focus for any length of time. That's why it's important to give yourself an attainable goal. For example, start out with two minutes of meditation daily for a week. Then gradually add time to your meditation practice by five-minute increments. Before you know it, you'll be meditating like a pro because you've allowed space in your schedule and your heart for mindfulness.

  • Make it the very first thing you do when you get out of bed. By making it part of your daily routine, you're sending a signal to your brain telling it that your practice matters. You're then able to focus on meditating without rambling thoughts filling your brain. You know that just as soon as you're done spending time on your meditation cushion, you'll be ready to start your day's To Do List. No matter what else happens throughout the day, you'll have taken some much-needed time for yourself.

  • See your thoughts as fleeting and your feelings as temporary. Treat what you're thinking and how your feeling as it comes up. Understand that you don't have to respond to them in the moment. Instead, accept that you've had these thoughts or feelings. Explore why they've come up during your meditation practice. Write down a few solutions to every issue that you're facing. This forces you to be proactive instead of reactive. You'll then be able to focus on meditating knowing that you have the option to problem solve after you're done with your meditation session.
You may not be able to control your thoughts when you first start meditating. After learning a few tricks, however, you'll feel your worries slip away. Being able to quiet the mind is a skill that anyone, no matter what their age, can learn.


© Copyright – Aura Wellness Center – Publications Division

To see our selection of Yoga teacher training courses, please visit the following link.

https://aurawellnesscenter.com/store/

Click here too see our online Yoga Nidra teacher training course.

Are you an experienced teacher looking for YACEP credits or continuing education?

Subscribe to Our Newsletter for Special Discounts and New Products

Related Resources

The YOGA MIND: 

52 Essential Principles of Yoga Philosophy to Deepen your Practice 

by Rina Jakubowicz.

RESTORATIVE YOGA FOR LIFE

A Relaxing Way to De-stress, Re-energize, and Find Balance

by: Gail Boorstein Grossman.

YOGA: THE PATH TO HOLISTIC HEALTH

by B.K.S. Iyengar

TEACHING YOGA: Essential Foundations and Techniques

By Mark Stephens

Please feel free to share our posts with your friends, colleagues, and favorite social media networks.

Find Your Inner Calm

A relaxed day begins with a good night’s sleep. Aura Wellness Center offers an online Yoga Nidra course which includes content to help you l...